LoadRunner C functions to convert the case of a captured string

This sample script, kindly provided by Mark Sibley shows how to change the case of a captured string.
Mark has written functions which change the case of a string to upper case, lower case or title case.

Either download the script, or paste the functions below into a LoadRunner script “as is” and then call them using the ConvertToUpper, ConvertToLower or ConvertToTitle functions.

For each function, the syntax is as follows.

ConvertToXXXX(“sINPUT”,”sOUTPUT”);
Where XXXX is Upper, Lower or Title
sINPUT is the name of the captured string.
sOUTPUT is the name of the new output string.

ConvertToUpper function
int ConvertToUpper(char * sInput, char * sNew)
{
sInput = (char *)strupr(sInput);
lr_save_string(sInput,sNew);
}

ConvertToLower function
int ConvertToLower(char * sInput, char * sNew)
{
sInput = (char *)strlwr(sInput);
lr_save_string(sInput,sNew);
}

ConvertToTitle function
int ConvertToTitle(char * sInput, char * sNew)
{
int i = 0, s = 0, l = 0;
char buf1[50];
char buf2[2];
char n;

// Copy a single character into the address of [n]
strncpy(&n,sInput+i,1);

// Copy the single character into buf2
sprintf(buf2,”%c”,n);

// Convert the contents of buf2 to uppercase
strupr(buf2);

// Overwrite the contents of buf1 with buf2
strcpy(buf1,buf2);

i++;
while(i < strlen(sInput))
{
// Overwrite buf2 with one character
strncpy(&n,sInput+i,1);
sprintf(buf2,”%c”,n);

// If the previous character was a space then make the current character upper case
if(s == 1){
strupr(buf2);
strcat(buf1,buf2);
s = 0;
}
// Otherwise convert to lower case and concatenate the current character into the string buf1
else{
strlwr(buf2);
strcat(buf1,buf2);
}

// If the current character is a space set the value of [s] to [1] so that the next character gets capitalised
if(strcmp(” “,buf2)==0)
{
s = 1;
}
i++;
}
lr_save_string(buf1,sNew);
}


More sample scripts are avaiable at my GitHub library – https://github.com/richardbishop/LoadRunnerSamples
Performance Monitoring Best Practices (LoadRunner)

Leo Borisov (Functional Architect at HP) posted this to a LinkedIn discussion group on LoadRunner.
I just downloaded this document and it looks pretty good, it contains details of the best performace counters to monitor for Windows and UNIX systems and has details of different web servers such as WebLogic, WebSphere, IIS etc.

Leo’s LinkedIn posting which explains how to download the document is reproduced below.


I wanted to draw your attention to the fact that the recently released Service Pack 1 for HP LoadRunner and HP Performance Center includes a “Performance Monitoring Best Practices” book. This is the first installment in the “HP Performance Engineering Best Practices” series that HP Software and Solutions intends to release on the regular basis. We have always recognized the fact that having best practices and methodology would greatly simplify the life of performance engineers and managers, and now we are beginning to fill this need.

The book is available with the SP1 installation. Access it from the product documentation library, or from the Help menu.

Updated link:
http://lrhelp.saas.hpe.com/en/latest/help/PDFs/Monitoring_BP.pdf


Change LoadRunner Analysis global filter without resetting graphs to default

I regularly use global filters in LoadRunner Analysis, for example, to filter out the ramp-up and ramp-down portion of a performance test. Then I create filters for individual graphs to show or hide relevant transaction response times or performance statistics. I have noticed that if I run a test at a different volume and therefore a different ramp-up when I change the global filter, this resets all the graphs to their default views which is very annoying.

e.g. The problem
Analysis Screenshot


If you change Global filter, for example by adding one second to the filter.
Analysis Screenshot

After clicking “OK”, LoadRunner “helpfully” re-applies the global filter settings….
Analysis Screenshot

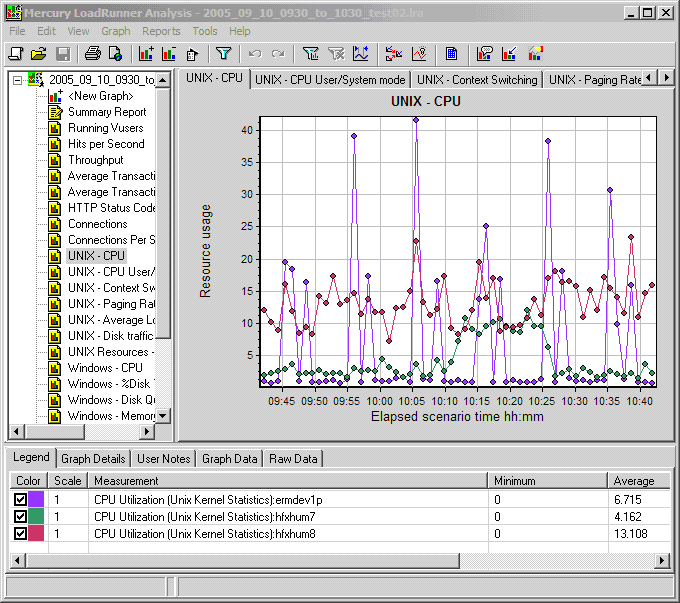
…and overwrites all the other filters, in this case we can now see all the UNIX counters, not just the ones for CPU utilisation that we wanted.
Analysis Screenshot

To get round this problem you need to manually edit a number of text files in the template folder. This allows the change to be made without all other settings being overwritten. 

  1. Navigate to the folder containing the Analysis Templates. The default location is C:Program FilesMercury InteractiveMercury LoadRunnerAnalysisTemplates
  2. Open the folder that contains your existing template.
  3. Open all the files with a DEF suffix and the TEM and ASC files in a text editor that allows search and replace through multiple files. I would recommend using Textpad for this.

Search for the “Values” section under the [Result0_GLOBALFILTER0] section in the .TEM file. In the example below the values show a global filter from 6 minutes to 66 minutes (360 to 3960 seconds).
TextPad screenshot

Using the search and replace option modify the start and end times, ensure that you select the  “All documents” scope, to ensure that the change is made in all the open documents, this will modify the same text in the .DEF, .TEM and .ASC files.
TextPad screenshot

After changing the values, save all files.
The template can now be re-applied without losing the non-global filters.

N.B. If you rename the .TEM and .ASC files you also need to rename the template folder accordingly.